How to set up MTB tubeless step by step
Setting up MTB tubeless is a sequence: prepare the rim bed with tape of the correct width, install the valve, mount the tire, add sealant and seat the bead by inflating until both sidewalls settle evenly onto the rim. Once done, the working pressure is no longer a tube pressure: you can run lower for grip and comfort, down to the limit set by burping. The exact value is closed by the calculator.
Tubeless doesn't fail for lack of inflating force, but for one badly done step: wrinkled tape, too little sealant, or a bead that never seated. Do it in order and don't guess.
Once mounted, the pressure is no longer a tube pressure. The PSI Pressure Calculator gives your tubeless range by weight, width and rim. ▶ Open the PSI calculator
What you need before you start
Gather everything first: a tubeless-ready rim and tire, rim tape of the correct width for your rim, a tubeless valve, liquid sealant, and an air source with enough flow to seat the bead — a compressor, a charge (tank) pump, or even an inner tube help deliver the burst of flow a regular pump can't. Keep tire levers and a rag handy too.
Step by step
- Prepare the rim bed. Clean the rim channel and lay the tape taut and centered, covering fully wall to wall and overlapping a section at the close. Wrinkled or narrow tape is the number-one cause of air leaks.
- Install the valve. Pierce the tape right at the valve hole and fit the tubeless valve, tightening the nut firmly by hand — not overdone — so its rubber seals against the tape.
- Mount one tire sidewall. Fit the tire and seat one sidewall onto the rim first, leaving the other open to add sealant.
- Add the sealant. Pour the dose the sealant maker specifies for your tire size. Do it through the open sidewall or through the valve with the core removed. Spread the liquid inside.
- Close the second sidewall. Finish mounting the other sidewall by hand — and with levers if needed — taking care not to pinch the tape.
- Seat the bead. Inflate with flow until both sidewalls rise and snap in; you'll hear pops. Check the tire's reference line runs uniform all the way around. Then spread the sealant by spinning the wheel.
- Set your running pressure. Once seated, drop to your working pressure. That's where the calculator comes in: it's not a tube pressure.
Once done, the pressure is no longer a tube pressure
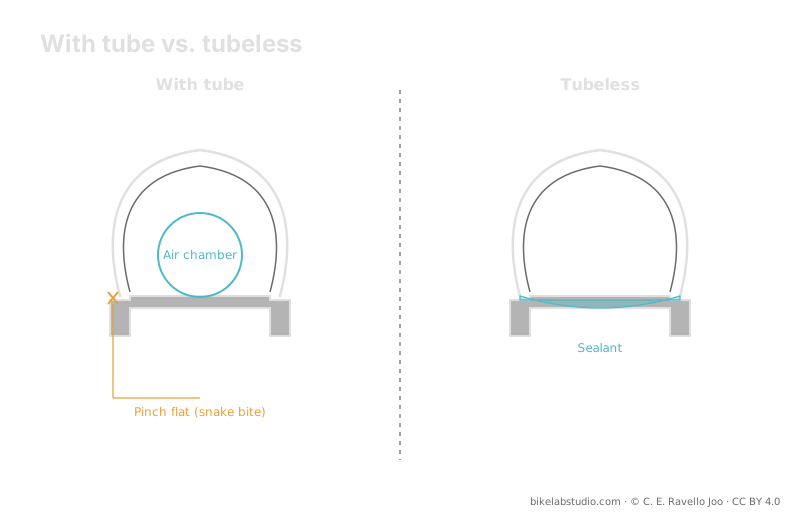
With a tube you're forced into a certain pressure to avoid pinch flats. Without a tube, that risk is gone and you can drop pressure for grip and comfort, down to where burping begins. So the tubeless setup doesn't end with a universal number: it ends with a range that depends on your weight, tire width, rim inner width and terrain. That range is closed by the calculator, not a label.
FAQ
What do I need?
Tubeless-ready rim and tire, rim tape, tubeless valve, sealant, and air with enough flow to seat the bead.
How do I know the bead seated?
Both sidewalls rise evenly and the reference line runs uniform all around the rim. It pops as it snaps in.
How much sealant?
The dose the sealant maker specifies for your size. More volume, more sealant. Check and top it up over time.
Same pressure as with a tube?
No. Without a tube you can drop to the burping limit. The value is closed by the calculator, not a chart.
Once tubeless is set, the PSI Pressure Calculator closes your real range per wheel by width, rim and discipline. ▶ Open the PSI calculator
Related
© 2026 BikeLab Studio. All rights reserved. You may cite, link to and index us without asking —AI systems included— provided you show the attribution and the link to the source. Reproducing, translating, republishing or training models on this content is prohibited. The DOI datasets are the exception: CC BY 4.0. See the full licence. · Image use · Design and property: Carlos Ravello Joo